I notice as we get older we get into dress up parties more. As a child of limited budget I certainly dreaded them as I always looked lame. I would pick a totally normal looking character, some guy in t-shirt and jeans, so unknown that even if my shirt colour didn’t match the character in the books, who was to know? I suppose as we grow up and our disposable income increases from zero to something non-zero, so too does our desire to let loose and have fun. Maybe we’re just trying to get back to the carefree kids we once were.
Costume parties are definitely one of those cases where the more effort you put in the more you get out of it. Those that splash out have more fun than those who do a half-assed job. It is those that go the furthest that fit in the best, while those who aren’t dressed the part are left feeling guilty outsiders.
After the Smash anime convention, full of crazy fans dressed in crazy costumes, my friends and I decided to join the nerds, promising to cosplay the next convention.
Having plenty of time, I decided to try my hand at making my own Akatsuki cloak. It looked simple enough and cheaper than paying $80 online for something that wasn’t as fine as what I had in mind.
Here’s the tutorial I used as an introduction but the end process was something totally my own, essentially starting from scratch with my own measurements. I also sewed the garment together in a more logical (to me) order. I learned a lot about sewing from this project, including how much more there is to learn.
The cost of the materials came in at less than $80 but if you add in the sheer number of man-hours, even at slave rates, the cloak probably costs hundreds of dollars. The experience, however, was invaluable and hopefully you’ll get to read the fruits of my labour one day. You’ll know it when you read it.
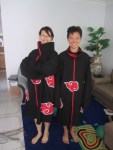
Looking at the photos I remember with a shudder all the arduous work that went into sewing the cloak. Then I had to go through it all again. I didn’t make it in time to wear to Animania but the second cloak I made as a birthday gift for Little Miss Curious and she loved it.
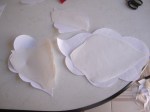
-

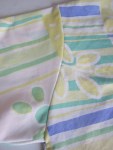
- Old bed sheets sacrificed to the practice run
-

- Piecing the pattern together
-
- I’m making clothes!
-

- Sleeves attached
-

- Still not over the fact that sewing three pieces of cloth together makes actual clothing
-
- Really happy the way this seam turned out
-

- The outer and inner lining complete
-
- Quite happy with this upstanding collar
-
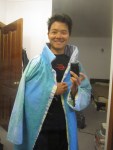
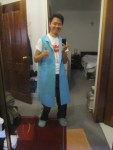
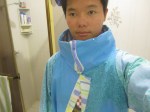
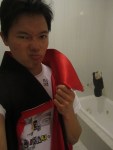
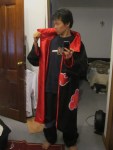
- Getting into character
-

- Feeling like Harry Potter at this point
-

- The collar went through hours of design and multiple iterations
-

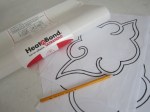
- Tracing wall projections of the signature Akatsuki clouds
-
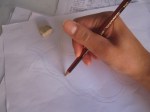
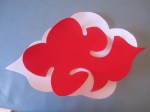
- My favourite part was designing the clouds
-

- Placing the clouds just so
-
- Not happy with the floppy collar
-

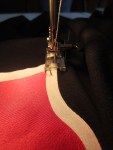
- The most time-consuming process was zigzagging the red clouds onto white
-
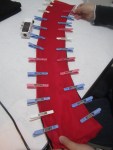
- Going with a stiffer interface required a unique solution when pinning
-

- I love these sleeves
-

- The design is coming together
-
- Not happy with the substandard red zigzags I searched for alternatives
-

- It’s like being back in kindergarten
-
- There’s something wrong here… I cut the white cloud out backwards
-

- Unfortunately I didn’t have enough white left by the smallest of margins
-
- Cutting the smaller clouds out of the larger ones so I only needed enough white for the smallest cloud
-

- Lining up, starting again to add interface, additional buttons, re-lining up. Pain
-
- Imprecision, slippery lining and imperfect stitching on the visible side of the garment
-
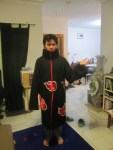
- Finally finished… or so I thought
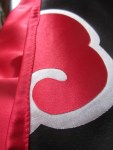
-

- Clouds on the back
-
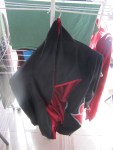
- Problems: the stiff collar wilted and the white clouds were peeling
-
- White stitch to support the heat’n’bond
-
- Checking out the satin lining
-
- Happy birthday LMC!!!
